Do you want to change user folder name in Windows 10 after changing the username? Then, changing the user account name doesn’t rename the user folder. It is a whole different thing, so if you are wondering how to change the folder name to match the user account name, then in this article, you will see a workaround for that.
Way to Change User Folder Name in Windows 10
In the previous article, I changed the username to iTechFever from Windows 10. But the folder name remained the same. You can go to the following path and check the folder name.
This PC> Local Disk(C:)>Users
Steps to follow
Before you start the process, I suggest you take a backup of your important files and create a system restore point. Here is how to create a system restore point:
Creating a System Restore Point
A system restore point is important. If anything goes sideways, you can always revert back to this point, and everything will be fine on your PC. To be on the safer side, take a full system backup.
Step 1: Go to the Windows taskbar and type “sysdm.cpl” in the search bar, and hit enter.
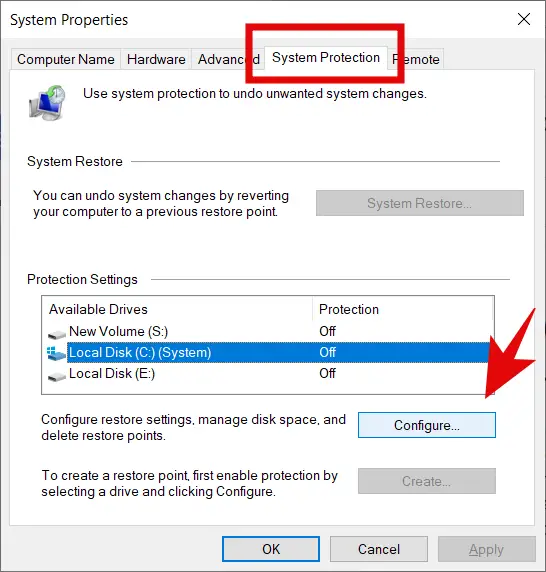
Step 2: Navigate to the System Protection tab and select Local Disk(C:). Once you do that, click on Configure.
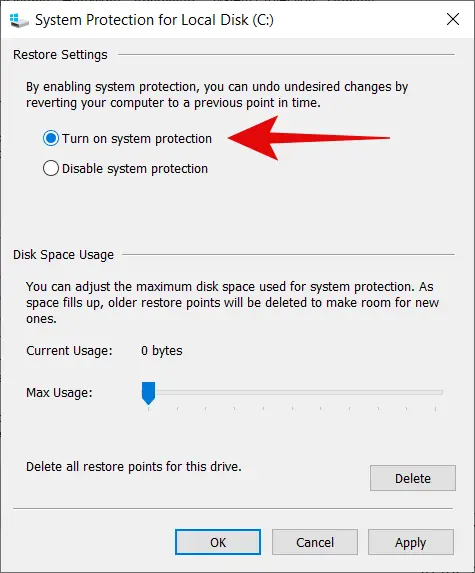
Step 3: Now click on the Turn on system protection. Click on Apply and then on OK.
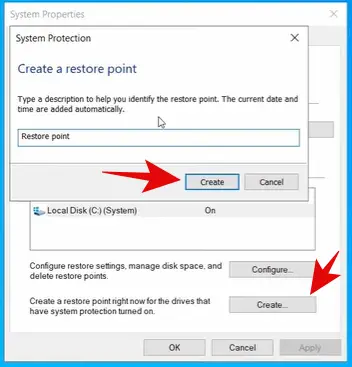
Step 4: Click on Create.
Step 5: Name it anything you want and then click on Create again.
Finding the SID Value for the User Folder
Every user account has a different SID value; you have to find the correct SID value for your user account.
Step 1: Go to the Windows taskbar, type “Command prompt,” and right-click on it to Run as administrator.
Step 2: Once the command prompt window opens, type the following command and hit enter:
wmic useraccount list fullStep 3: You will see the account details here. Now find the line reading FullName=YOUR_USERNAME and note down the SID value for it. If you have more than one user account, find the right one.
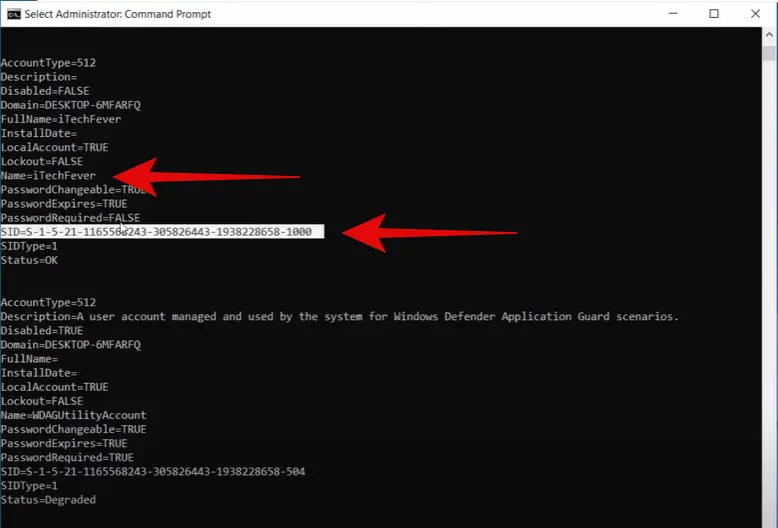
In my case, it is FullName=iTechfever. So I can note down the SID value for this account.
Creating a Temporary User Account
Once you have the SID value for the user account, create another temporary user account to change the user folder name for the first account.
Here is how to do it:
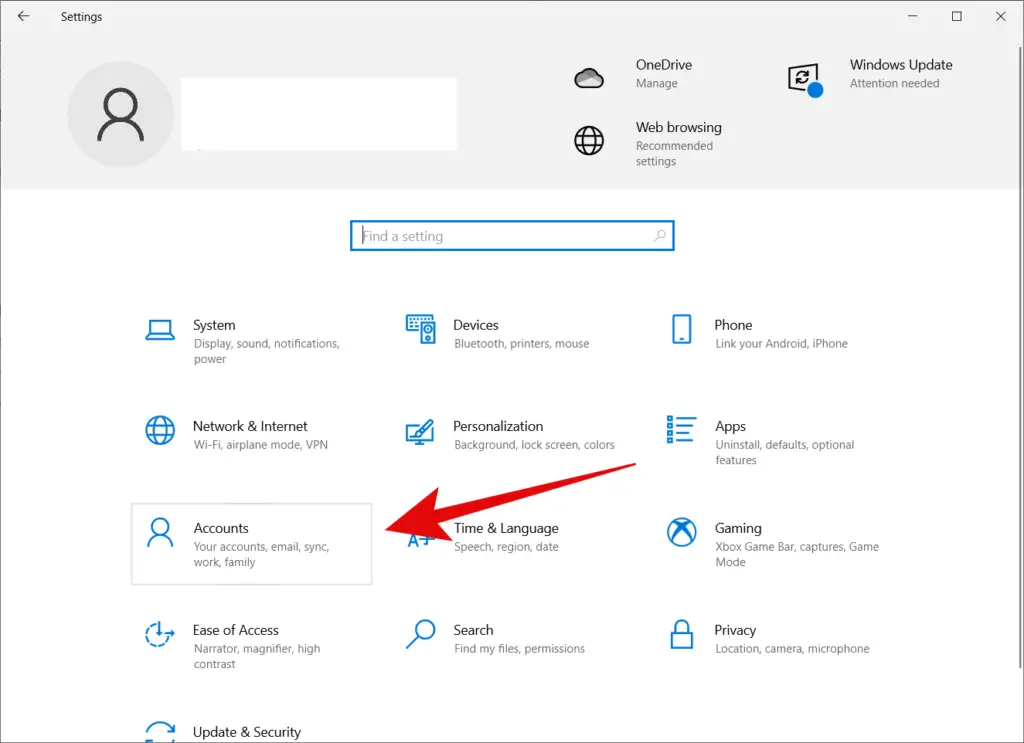
Step 1: Go to the Windows 10 taskbar, type “Settings” in the search option, and enter.
Step 2: Click on Accounts.
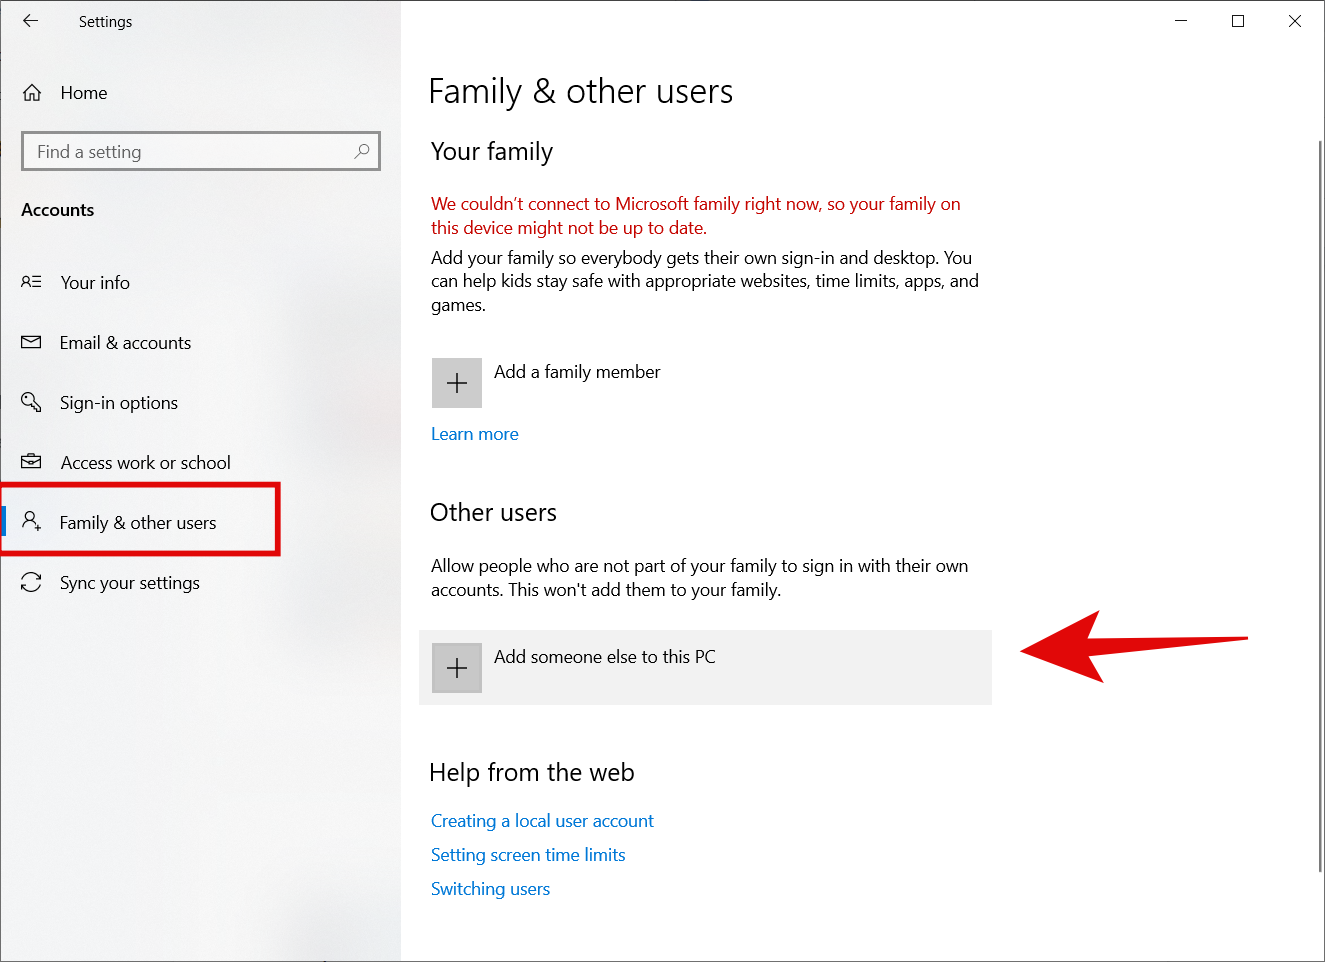
Step 3: Go to the Family & other users tab from the left and click on Add someone else to this PC.
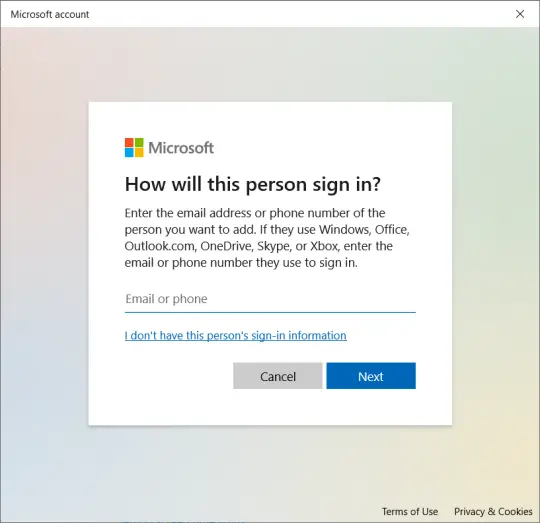
Step 4: In the new menu, click on I don’t have this person’s sign-in information.
Step 5: Click on Add a user without a Microsoft account.
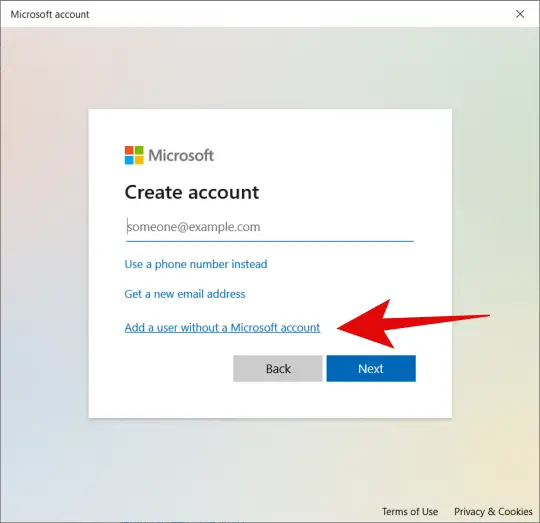
Step 6: Now enter the name and password for this new account. Click on Next.
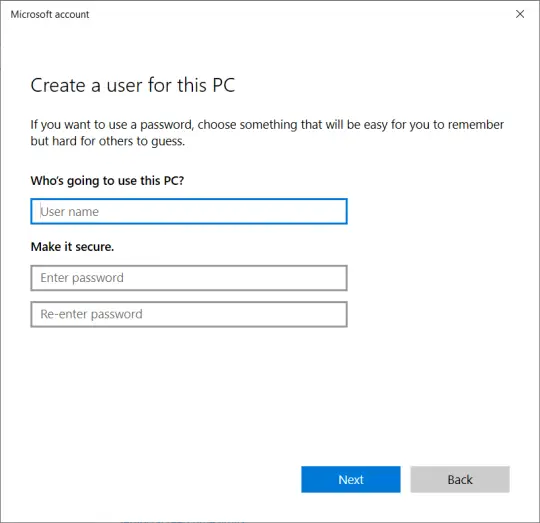
Now you have a new temporary account for yourselves. You can also leave the password field empty if you want.
Assigning Admin Rights to the Temporary Account
To have full privileges, you need to assign admin rights to the temp user account.
Step 1: Go to the Windows 10 taskbar, type “Control Panel” in the search option, and enter.
Step 2: Change the View by option to Large icons from the drop-down menu on the top-right.
Step 3: Scroll down and click on User Accounts.
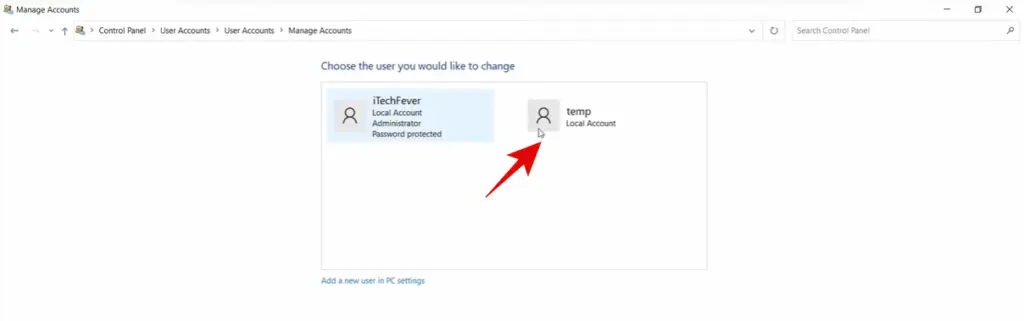
Step 4: Click on Manage another account.
Step 5: Click on the temporary account.
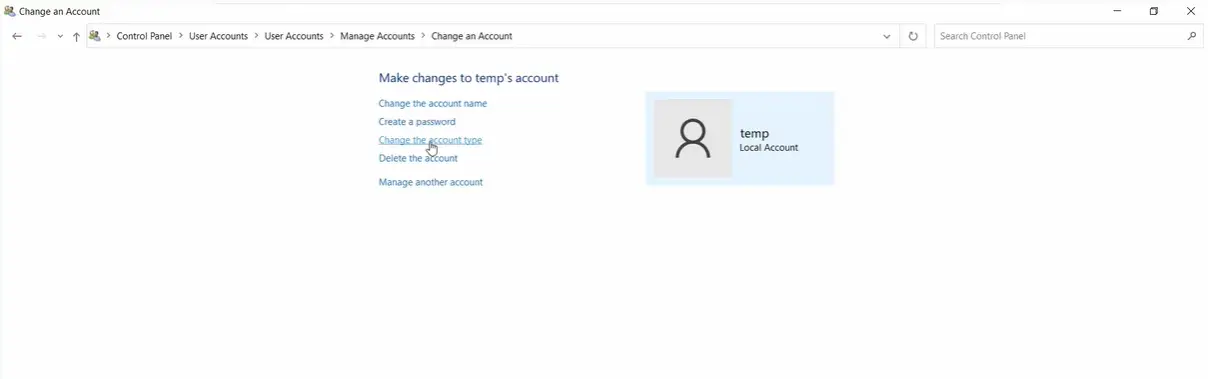
Step 6: Now click on Change the account type.
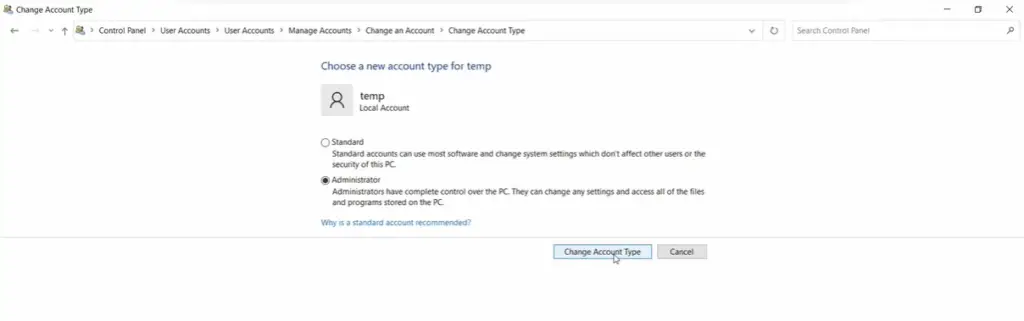
Step 7: Select Administrator and then click on Change account type.
Once it is done, close everything and sign out. After that, sign in to the new temporary account.
Changing the User Folder Name
Step 1: Go to the Windows taskbar, type “Command prompt,” and right-click on it to Run as administrator.
Step 2: Once the command prompt window opens, type the following command and hit enter:
cd c:\UsersStep 3: Once you are in the Users directory, type the following command to change the user folder name and hit enter:
ren OLD_FOLDER_NAME NEW_FOLDER_NAMENote: If the old folder name has space, you have to put it in quotes.
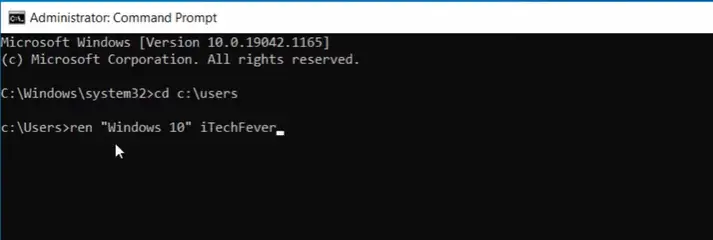
For example, in my case, I have to type: ren “Windows 10” iTechFever (Windows 10 – Old folder name, iTechFever – New folder name)
That’s it! That is how you can successfully change the user folder name on Windows 10.
But that is not it. You also have to point the username to the new folder name, and that can be done via the registry.
Pointing the Username to New Folder Name
Since the new user account was pointing to the old folder, you have to point it to the new folder to make everything work as usual.
Step 1: Go to the Windows taskbar, type “regedit” and right-click on it to Run as administrator.
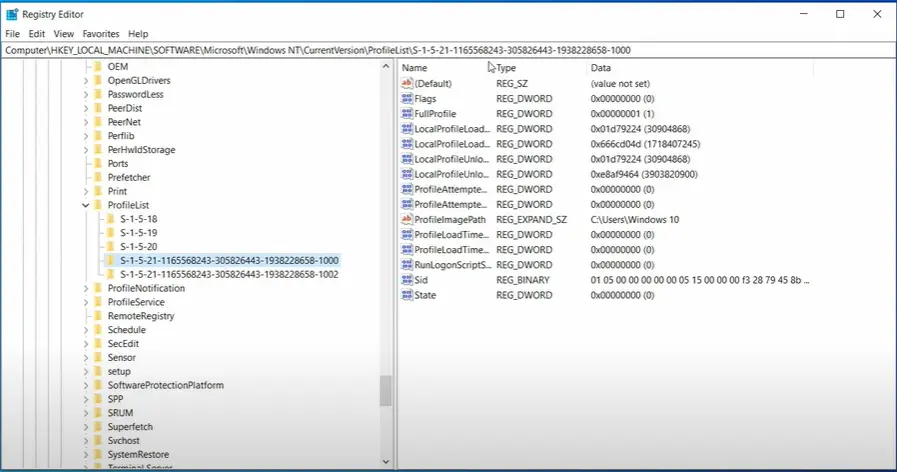
Step 2: Expand the drop-down menu on the left and navigate to the following path:
KEY_LOCAL_MACHINE\SOFTWARE\Microsoft\WindowsNT\CurrentVersion\ProfileList
Step 3: Now, you have to locate the SID number you noted down in the beginning. Double-click on it to open the menu on the right.
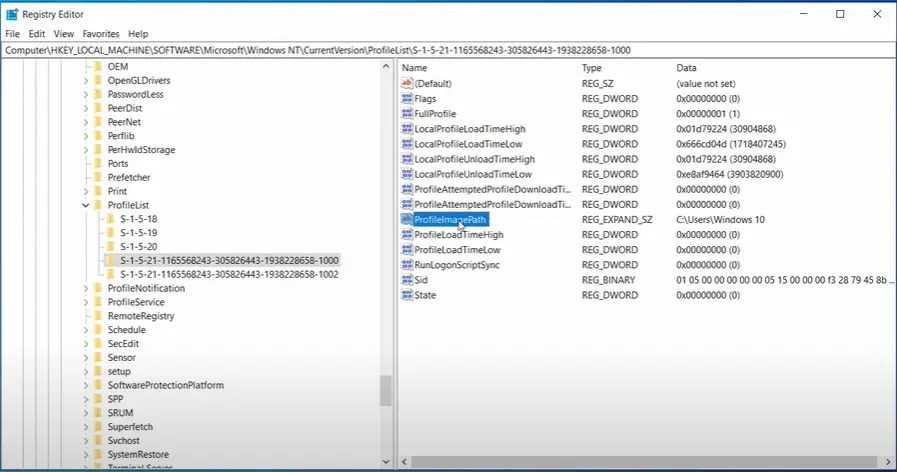
Step 4: On the right side pane, you must find a registry named ProfileImagePath and double-click on it.
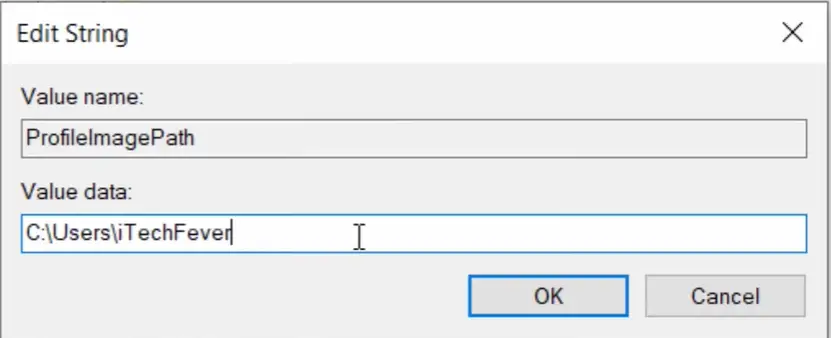
Step 5: Now replace the old folder name with the new one. Click on OK.
In my case, the older folder name was Windows 10, and I changed it to iTechfever.
The value data should read – C:\Users\Folder_Name
That is it! Now restart your PC and then log in with your primary user account.
Deleting the Temporary User Account
After the operation, log in to the original account and delete the temporary account.
Step 1: Go to the Windows 10 taskbar, type “Control Panel” in the search option, and hit enter.
Step 2: Change the View by: option to Large icons from the drop-down menu on the top-right.
Step 3: Scroll down and click on User Accounts.
Step 4: Click on Manage another account.
Step 5: Click on the temporary account.
Step 6: Now click on Delete the account.
Step 7: Click on Delete Files and then click on Delete Account.
Verdict
There might be different situations where you need to change the user account name, but changing the username won’t change the user folder name. You have to follow the above workaround to actually change the user folder name and point it to the new user account name.
It is important to take a full backup and create a system restore point; if anything goes wrong, you can easily revert the changes.
The process is simple, and you can’t do it without a temporary account. Just ensure you follow all the steps carefully, and you should be all good.
In case of any difficulty, feel free to reach out to us anytime.
Also, Read: