It is pretty frustrating when WiFi is connected, but there is no Internet access on Windows 11. You open your PC, connect the WiFi, and then open an app or browser to use the Internet, and it shows no Internet. This can be very frustrating as it disturbs the workflow,, and that is why fixing the issue becomes important.
If you also encounter the WiFi connected but no internet error on Windows 11, this is the right page. Today, we will examine some ways to fix it.
Fix WiFi Connected but No Internet on Windows 11
Here are the different ways to fix the Internet issue on your Windows 11 PC. Try these methods one by one, which should help you fix the connectivity issue depending on the problem with your PC.
Check the Proxy Server and VPN
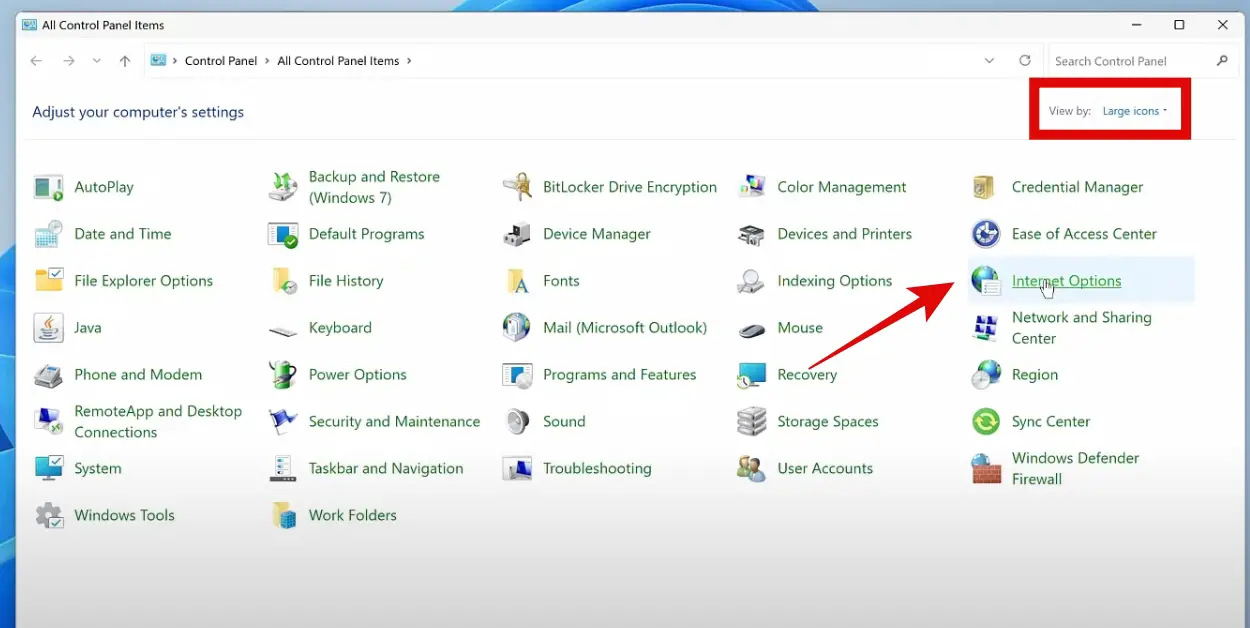
1: In the search bar, type Control Panel and hit enter.
2: Under View Type: select Large icons from the drop-down menu.
3: Now click on Internet Options.
4: Go to the Connections tab and click on LAN settings.
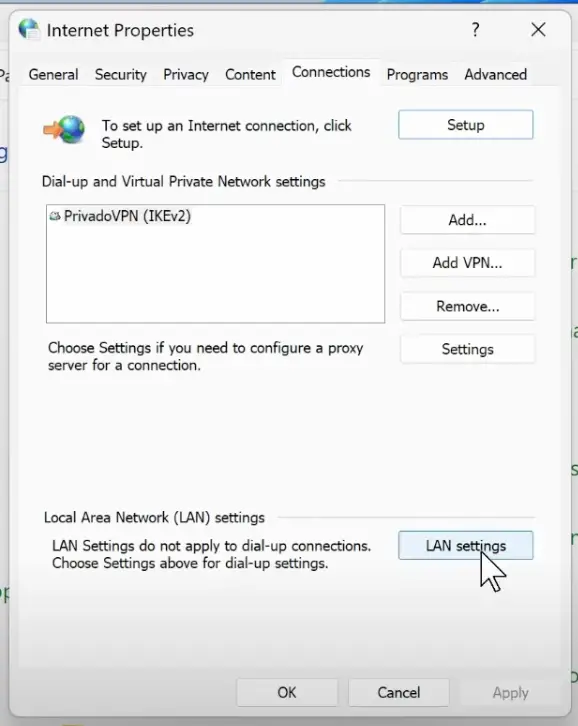
5: Delete the Address and Port, and Uncheck the box under Proxy server.
6: Select Automatically detect settings and click on OK.

7: Now go to the Advanced tab.
8: Here, click on Reset advanced settings.

Hit Apply and OK.
You can also try to remove any VPN profiles. Here is how:
1: Go to the Connections tab.
2: Check if there is any profile under Dial-up and Virtual Private Network settings.
3: Select the profile and then click on Remove. Click on OK.

Finally, click on OK.
Now, check if the internet is working or not.
Check IP and DNS to fix WiFi connected but no Internet on Windows 11
1: Click on the Windows icon on the Taskbar.
2: Click on Settings.
3: Now, click on Network & Internet from the left menu.
4: Here, click on WiFi.
5: Click on the connected WiFi network.
6: Scroll down and check if there is any manual IP or DNS address to the WiFi network.
Simply check the IPv4 Address and IPv4 DNS servers. If they are manual, you have to select automatic ones. Here is how:

1: Click on Edit next to the DNS server assignment.
2: Select the Automatic option from the drop-down menu and hit Save.

3: Repeat this for the IP assignment as well.
Note: If you see a message reading “The DNS settings for all Wi-Fi networks have been set…” then you can disable the manual IP and DNS from the control panel itself.

1: Go back to the Network & internet settings.
2: Click on Advanced network settings.
3: Expand WiFi. Click on View additional properties.

4: Click on Edit next to IP assignment and set it to Automatic from the drop-down menu. Repeat the same for the DNS server assignment.

This should work just fine, but in case you are having any issues, you can also do this from the control panel. Here is how:
1: In the search bar, type Control Panel, and hit enter.
2: Under View Type:, select Large icons from the drop-down menu.
3: Now, go to the Network and Sharing Center.
4: Now, you will be able to see your active network. If the ‘Access type’ shows “No Internet access”, click on your connection.

5: Here, click on ‘Properties’.

6: Select ‘Internet Version Protocol 4(TCP/IPv4)’ and then click on ‘Properties’.
7: Click on ‘Use the following DNS server addresses’.
8: Enter the following DNS addresses in ‘Preferred DNS server’ and ‘Alternative DNS server’ respectively: 8.8.8.8 and 8.8.4.4.

You can also use Cloudflare Lightning Fast DNS with the following addresses: 1.1.1.1 and 1.0.0.1
9: Click on OK.
Finally, restart your computer.
Run Network Troubleshooter
If none of the above methods are helping you in fixing the issue, the best thing is to run the Windows Network Troubleshooter. Here is how:
1: Open the Start menu and go to Settings.
2: Now go to System and then click on Troubleshoot.
3: Click on Other troubleshooters.
4: Now find the Network and internet troubleshooter and click on Run next to it.

Let the troubleshooter run and it will fix any issues with your WiFi.
Restart WLANAutoConfig Service
1: In the search bar, type Services, and hit enter.
2: Scroll down and find the “WLANAutoConfig” service.
Note: Make sure that the service is Running.
3: Right-click on the service and click on Restart.

Restart the Adapter
1: In the search bar, type Control Panel, and hit enter.
2: Under View Type: select Large icons from the drop-down menu.
3: Now, go to the Network and Sharing Center.
4: Click on Change adapter settings from the menu on the left.

5: Locate your WiFi network, right-click on it, and click on Disable.
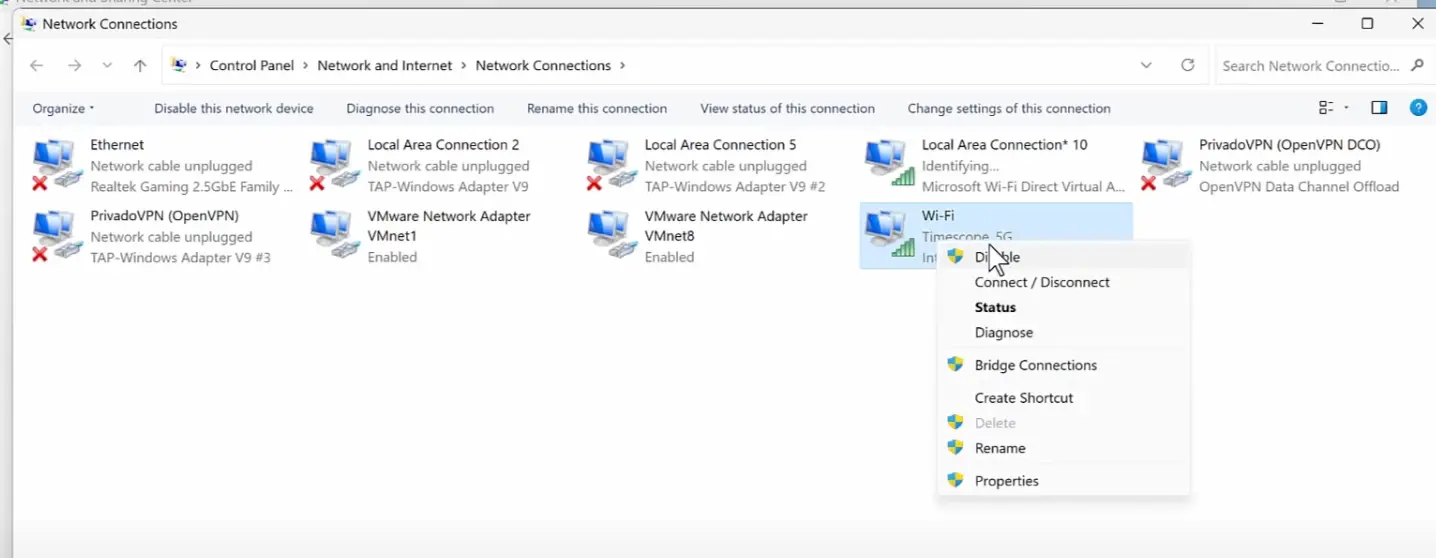
6: Now, right-click on it again and then click on Enable.

Fix Socket API Errors
Fixing the socket API errors can also help you fix the WiFi keeps disconnecting error on Windows 11. We will be executing a number of commands in CMD. Here is how:
Step 1: Go to the Windows Search Bar, type “cmd,” and right-click to ‘Run as administrator.’
Step 2: Type the following command and hit enter:
netsh winsock resetStep 3: Once this is done, type the following command and hit enter: netsh int ip reset
Step 4: Enter this command and hit enter:
ipconfig /flushdnsStep 5: Type this command and hit enter:
ipconfig /releaseStep 6: Finally, enter this command:
ipconfig /renewIf there are any socket API errors, this command will resolve them. Just restart your computer and check if the WiFi is working properly or not.
Network Reset
The next thing you can do is network reset, and here is how to do it:
Step 1: Go to Settings > Network & Internet > Advanced network settings.
Step 2: Scroll down and click on Network reset.
Follow the prompts to reset your network settings. It will restart the PC and check for the Internet after the restart.
Uninstall VPN Apps
If you are using any VPN apps, then this issue can be caused. Simply uninstalling the VPN app can fix the Internet issue. Here is how to do it:
Step 1: Click on the Windows icon on the Taskbar.
Step 2: Click on Settings.
Step 3: Here click on Apps on the left menu.
Step 4: Click on Installed apps.
Step 5: Click on the three horizontal dots icon and then click on Uninstall.
Follow the on-screen instructions to uninstall the app.
Update Network Driver
If the above method doesn’t work, you can try updating the network drivers. This is a seamless process. Here is how:
Step 1: In the search bar, type Device Manager and hit enter.
Step 2: Expand Network adapters.
Step 3: Right-click on your network adapter and then click on Update driver.
Step 4: In the next menu, click on “Search automatically for drivers.”
Make sure that you are connected to the internet, and this will find the latest drivers(if any) and update them.
Reinstall Network Drivers
If updating the network adapters didn’t work, you can try to reinstall them completely. Don’t worry as drivers get installed automatically.
Step 1: In the search bar, type Device Manager and hit enter.
Step 2: Expand Network adapters.
Step 3: Right-click on your network adapter and then click on Uninstall device.

Step 4: Uncheck the option reading “Delete the driver software for this device” and uninstall the driver.
This step should fix the issue for you.
Remove Network Adapters and Mini Ports
Step 1: Go to the Windows Search Bar, type “cmd,” and right-click to ‘Run as administrator.’
Step 2: Type the following command and hit enter: netcfg -d

This will uninstall all the network adapters and mini ports from your PC. Restart the PC, and the issue should be fixed.
Wrapping Up
That is all about how to fix the WiFi connected but no internet error on Windows 11. Make sure that you try all the methods that are mentioned in the guide. These methods work for most users and we hope they work for you as well.
In case of any issues, feel free to reach out to us.
FAQs About WiFi connected but No Internet on Windows 11
This issue can be caused by incorrect network configurations, outdated drivers, proxy server settings, VPN conflicts, or socket errors.
Yes, it’s safe to remove or disable VPN apps temporarily. Many VPN services can interfere with your internet connection. You can reinstall them later if needed.
Go to Settings > System > Troubleshoot > Other troubleshooters, then click Run next to Network Adapter Troubleshooter.
You can use public DNS like:
Google DNS: 8.8.8.8 and 8.8.4.4
Cloudflare DNS: 1.1.1.1 and 1.0.0.1